Saturday, April 28, 2012

Class Intermission!

Yes, I know this blog is for 3D modeling, not Photoshop, but now I have a chance to gripe about the length of time I spent in the maclab and its inability to let people go


If it makes no sense, it's because my brain is dead!!! (temporarily of course)

Tuesday, April 24, 2012

Finishing the Dragon 2

Before I start let me take the time to mention the numerous program crashes my friends have had on these computers...

I feel your frustration!!!

I got really lucky and landed a computer that barely anybody uses, so it actually did not crash when I tried to use it because it does not store multiple user's preferences on it

Therefore I am the exception rather than the rule that I completed the model mostly the way I wanted because the computer I used actually handled my dragon without crashing every time I select an object

By the way I used the mac side on that computer

Moral of story - Try picking a computer nobody uses and see if it works better (?) maybe?

Anyways...
Sorry about the huge progress jumps you are going to see here -
  
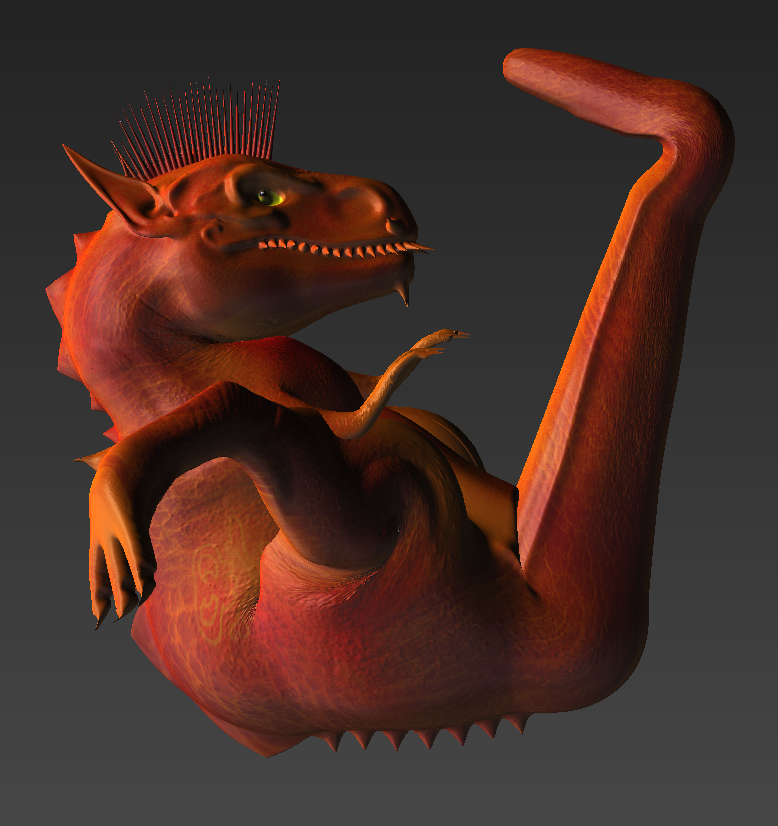
Back legs have been sculpted since the last update

I used a stencil that came with Mudbox to do the scales (you can see the frozen belly and spikes - he fell into a refrigerator for a couple of hours and when I took him out I had to defrost him)

Then I used stencils and PTEX paint layers to color it


 When I tried to PTEX the head it turned all blue and I could not see the color I was trying to add - All I did was press the "up" button and then it turned un-blue and worked again, so I have no idea what went on there

Here is the finished model - I do not know what to do with it, the background or anything, but at this point I do not really care much - I just want one or two hours of sleep and then to get up and study for my two Bible finals I have today


 Yes, I did model the tongue underneath there

Raaawr..

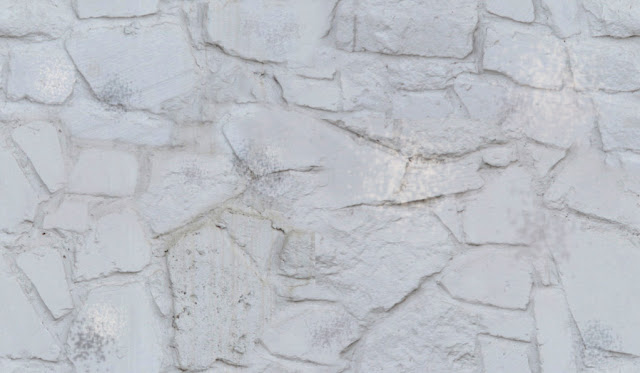
 I enjoy graffiti-ing on my models after I am done

 If I could do anything differently on this project, it would be to not build the wings out of curves - They were my ultimate modeling and texturing downfall - Also it is disproportionate so I would use an image plan to model on in Maya before I start

Also, I would have done more if I had more time, but I do not and also have little Mudbox experience, so I guess this is adequate for my first on-my-own model

UV-less painting is the savior of the world!!!

Verdict - I like Maya WAAAAAAAAAAY better for modeling - Mudbox is okay for texturing and coloring - that is if you have a super megacomputer that can handle objects with many polygons

Sunday, April 22, 2012

Finishing the Dragon 1

Here is the dragon at the beginning of the day -


Here is what I accomplished


I realized I had forgotten to bring in the wings

I am having some random trouble sculpting parts of the dragon - I really need to use the grab tool on his front claws to make them curve downward, but the grab tool will not work on the arms and I do not know why - maybe I can fix that with posing


Also because I built it from a curve I cannot separate its fingers without totally destroying its hand - So I will have to accept that its hands will not be completely accurate to the model


Wednesday, April 18, 2012

How to make a Derposaur

Yet another obstacle in the road to finishing my Lego dragon...Oh well, I had fun posing it!
The T-Rex tutorial! ...Or, as mine came out to be, a Durp-o-saur tutorial...  First, we created a basic mud-dino - Then we added some detail through sculpting


Between videos three and four, the tutor Justin added what he called a "little" detail - (ha, LIES) Basically in video 3 his T-rex looked like mine, the one on the right - Then, in video 4, the one on the left appeared and I was immediately humiliated - I am sorry; I just do not know the muscle structure of a 6,000 year old beast


 So, instead of carefully trying to follow his realistic approach, I decided to unleash a hideous being upon the world instead

 During the stencil-creating tutorial, which I had bad luck with on the dragonfly tutorial, I failed at making a good-looking spine texture and instead created a spikelike stamp - Since I went to the trouble of trying to copy his stamp, I went ahead and inserted it anyway:


Then Justin had me make this lovely displacement map!


...But not after a quick but harmless program crash!


After coloring it and adding elf ears and a goatee, I realized it kind of looked like a demon...


But that did not stop me from creating half a dozen disturbing poses with it!!!

Here is its skeletal structure


Now can I get back to my dragon? PLEEZ?

Also all my finals (including the dragon) are due on Tuesday so this weekend should prove interesting...

Sunday, April 15, 2012

Building Lego Dragons out of Mud

I attempted to re-render my "final" render from the last project before I turned it in:


I took away the clearly unrealistic fox from the scene and turned the light red - I also attempted moving the bike over to fill some of the empty space but it did not look very good - I also made the sky a little bluer and lightened up the street, which previously resembled an oil slick

Now on to the next project:

We picked out old toys to model - I took a dragon my history teacher gave me and will attempt to model it!


I modeled the base of my toy in Maya - It is a Lego-dragon (actually, it's Mega Bloks, but whatever...)


Here is how it looked in Maya (mostly built from curves then converted to Polygons)


Here is how it looks now, in Mudbox - I learned that you have to have all of the UVs in one square, with none overlapping one another before it can be moved correctly to Mudbox - Also, I kept wondering why it appeared in Mudbox super-blocky, and tried sending it over several times (frustrated), until Josh reminded me you have to subdivide it to smooth it (he he dur da dur I am an idiot)

Monday, April 9, 2012

Mudbox requires lots of memory...

After switching to the Windows side I had a hard time processing that fact that "Command" opens the Start menu and does not assist in Hotbox shortcuts - I became especially careful after I accidentally hit Command and then clicking after accidentally scrolling to the "Restart" button on the Start menu, causing the computer to reset in the middle of the project (good thing I saved!!!!)

Anyway, because I do not know how to edit the RAM or memory or anything on either the Mac or Windows side, there were a couple of things I could not follow along with - The program would refuse to open any files in the image browser, so I could not create the hair stencil (you can tell by the bald dragonfly I have created) or insert an image plane - Also I could not edit the PTEX texture in Photoshop of the eyes, but they still look okay (just flat and not-bumped)


Thankfully, map extractions worked every time I attempted them (albeit after freezing a few times in the middle)


After sending it over to Maya, however, its eyes disappeared along with all the detail (near the end Mudbox would not even let me switch between subdivision levels) and the branch and leaf color - At least the opacity map of the wings came through though!


One of the most popular signs appears again...

Even though the program crashed twice, froze every time I tried to save it, and prevented maybe 3 or so videos from me following along, I did learn the basics of Mudbox - I just don't know if I tried creating something if it would transfer to other programs correctly!


Friday, April 6, 2012

Let's play in the mud!

Mudbox is much less confusing than Zbrush - Thanks for letting us switch over, Jeff, I could not have possibly learned Zbrush within 2 weeks but maybe I can learn some Mudbox

The problem is that after I got to video 14 in the Introduction to Mudbox tutorials, the program keeps shutting down so I do not know what to do

First I learned how to divide the dragonfly's body up into parts using a chopful alpha ("I mean..stamp..") and the sculpt tool


Then it turned yellow, annoyingly - but I continued to sculpt detail into it


This was my favorite part - posing the model - I would love to bring other models into here just to pose them ridiculously!  (Unfortunately, when I tried bringing my Fox model into here, he was breaking all the Mudbox rules, apparently I modeled him very very wrong...)  When he came in an ear and an arm were missing and he was all blocky and non-smoothed...

...So I decided to mess with the shadow-linking of his eyebrows in Maya instead because the shadows were distracting me whenever I looked at renders of it (in the second picture his eyebrows do not cast shadows)


All I did was select everything in the scene, click Rendering>Make Shadow Links, then select the eyebrows and the light source and Break the Shadow Links - Then in the rendering options I had to make sure that under the Quality tab, Shadow Links were on (hooray, I did learn something useful watching all of those Lighting tutorials!)

Tuesday, April 3, 2012

End of the End, PERIOD. And the TARDIS.

The only reason it took me so long to finish this project was that I kept being perfectionist about it all and kept tweaking stuff little bits.  I watched the whole Introduction to Rendering in Maya course and a bunch of random Youtube videos Jeff sent us all about lighting, but ended up only using about 8% of it while setting up my lighting.  Oh well, at least I took notes and may be able to use the knowledge later.

Unfortunately, I forgot to take screenshots during this process, so I don't have much to put here.

Here's my setting up a spotlight, which I learned quite a lot about in the first couple of videos in the course of Digital Tutors I watched.  I am setting the "Barn Doors," which block light from any side of the spotlight you want.  I have also entered the "Look through selected" mode, which allows you to pick an object and see everything from its point of view.  I used this a little to aim the light.

 
It's half a fox!!

During the project, I noticed that since I made my spotlight so bright, it lit the back of the diner.  It brought my attention to my door, which I had put a layered texture of a glass smash on.  I realized that it wasn't transparent, so I had to figure out how to make the middle of the glass smash see-through, while the rest only semi-transparents.  I finally found this cool video that solved my problem:


He used Photoshop to add an alpha layer to an image - which made part of his Targa file he made transparent!  It is pretty useful and fairly simple to understand. 

I ended up turning one of the Photography student's pictures into a seamless texture for my wall, if anyone wants to use it (unfortunately I think Weston is the only other person who could've really used it and he is already done...)

And its alpha, which one may or may not want to boost the contrast of when using it for a bump map or something:


Here is the final render - I originally had a giant red light, but Josh suggested it blended in with the fox's orange color too much, with which I agreed -  I understand that most of the foreground is empty, and some of that is due to that fact that the scene would not render at the size I set it to (even though the render frame gate told me otherwise) so it is a bit too wide

Ooooh yes, it is MUCH too wide - I will have to figure that out later, but after working 20 hours (with a break in the middle for dinner) I am personally sick of looking at it for now (I am happy that you can see thru the glass smash now though!)


Oh yeah, and after I was through, I found this old thing on my flash drive and re-rendered it better, plus edited the rotation points of the doors

And as long as I'm posting random things, this is quite hilarious:
It would be fun to correct spelling errors in the private diaries of the gramatically inept, I think